
EPM Installing Sectona Web Access
Sectona Web Access or Application access is an interface for the user and administrator to communicate with the vault and leverage system services. This guide provides detailed information for setting up Sectona Web Access in your environment.
Pre-installation tasks
You have the license file available with you.
You have set up a web server. Refer to the section 'Setting up IIS server' below.
You have installed Microsoft .Net Framework 4.5.2 or newer. Refer download link here.
You have installed Visual C++ Redistributable Packages for Visual Studio 2013. Refer download link here.
If you have purchased the enterprise edition or are using an evaluation version, please complete Sectona Vault installation by following steps given for embedded database
You have a valid SSL certificate.
You have installed Microsoft SQL Server (if you are using external RDBMS). Refer to compatible databases here. Once you install Microsoft SQL Server, create a database (Sectonadb), create a user named as 'Sectonadbadmin' and also make sure the user is devoid of parameters such as 'Enforce password policy', 'Enforce password expiration' and 'User must change password at next login'. The MS SQL user should have 'db_owner' role membership for the database created.
Installation Procedure
The setting up of Sectona Web access requires setting up a web server and installation of the Sectona Web Access component.
Setting up IIS Web Server
You can skip this step if you want to install the IIS server using the standard application installer. If you want to setup the IIS Web Server manually follow the steps listed in respective Windows Installation instruction.
Installing Sectona Web Access with embedded password vault
Provided you have successfully installed Vault storage component. Refer the section EPM Installing Vault Component
Download Sectona Web Access installer from the Download portal. You can also request a copy of the installation from the Sectona Support team. Contact the support team for issues on their email address at support@sectona.com.
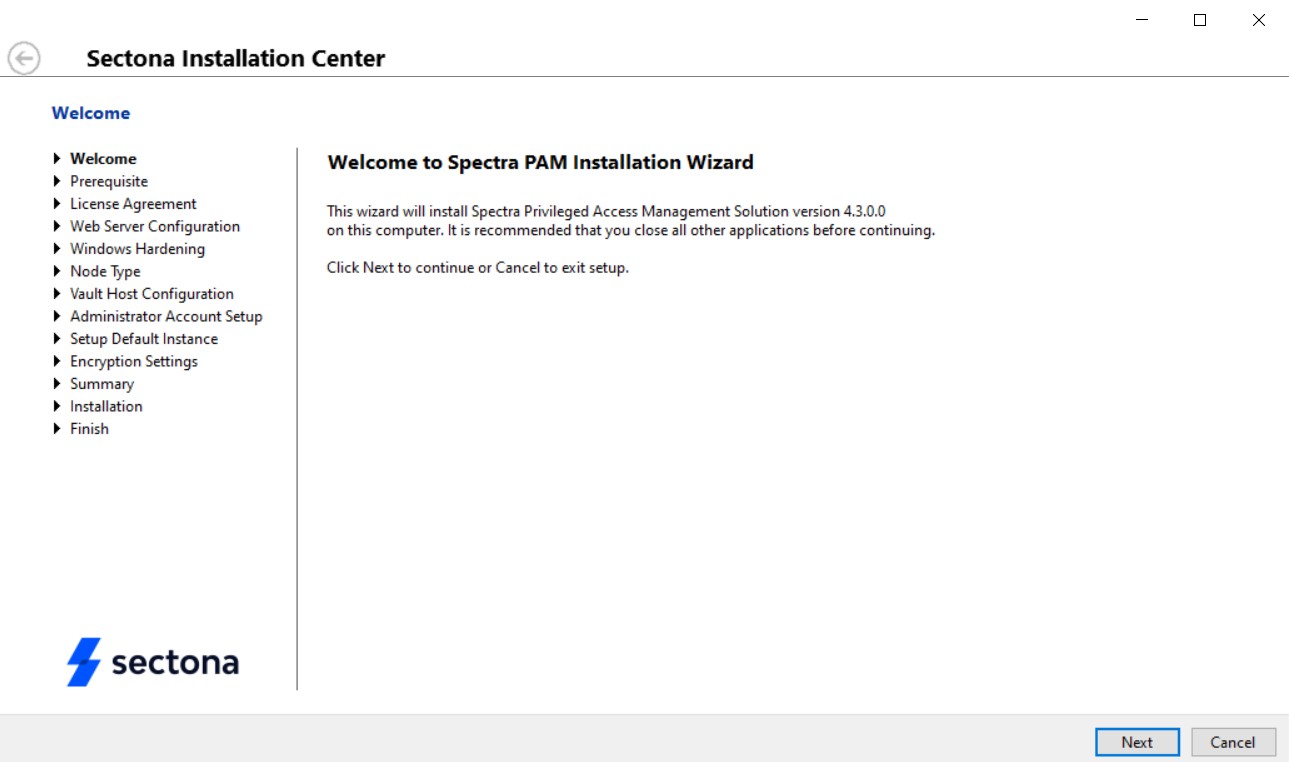
- Run and initiate the installer.
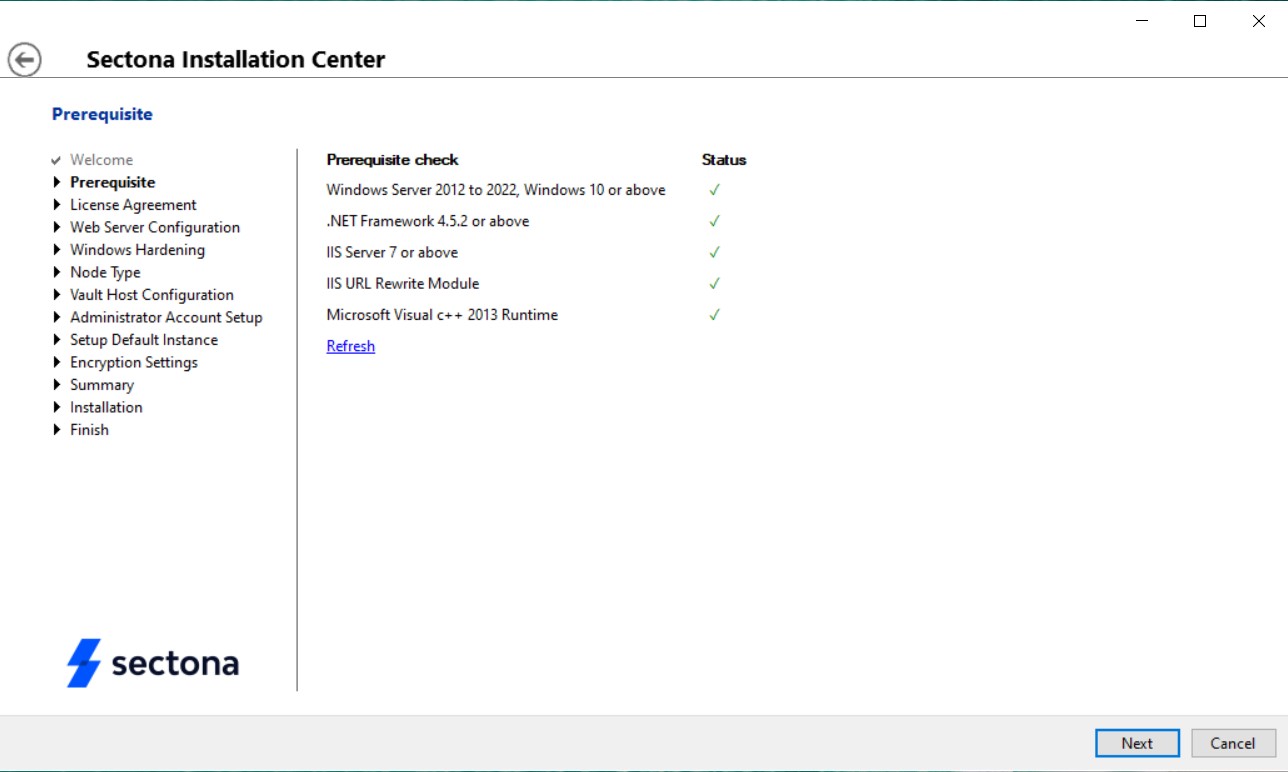
- Validate prerequisites and install any missing components to rerun the installer.
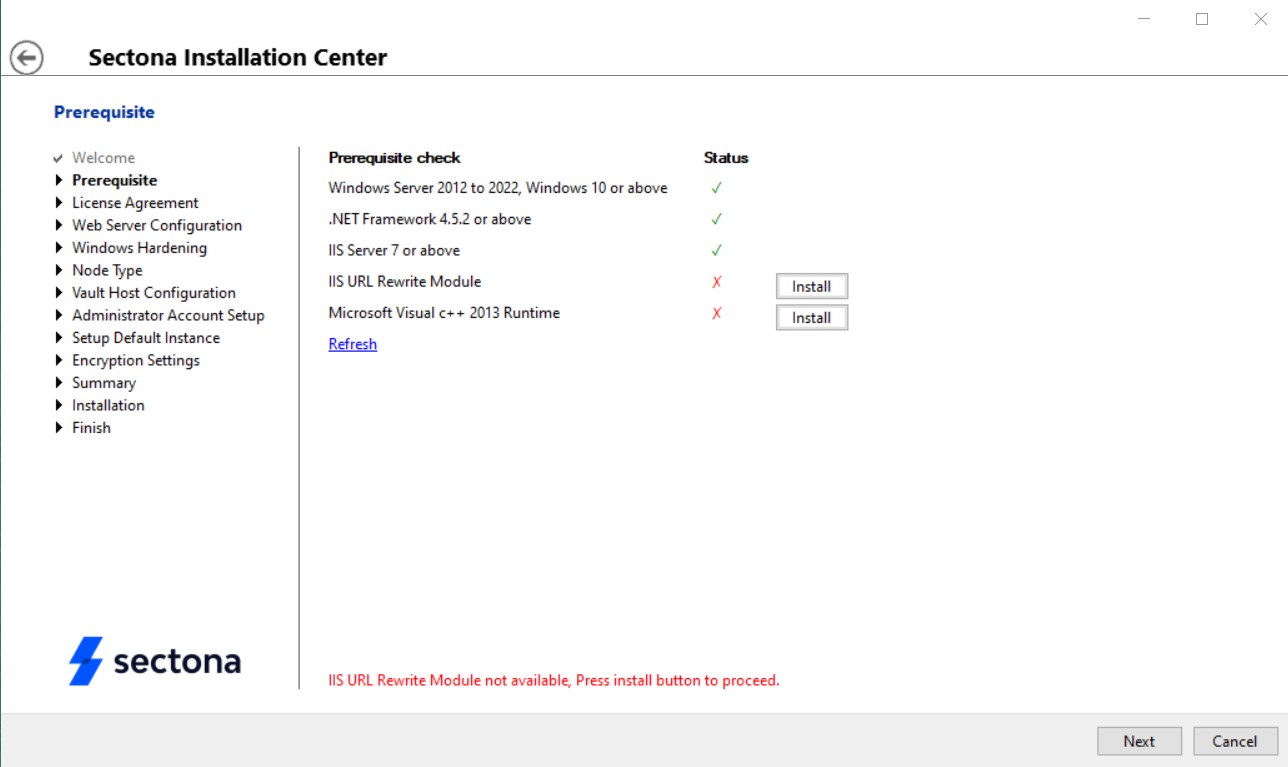
- Once your pre-requisites are validated, click next to continue.
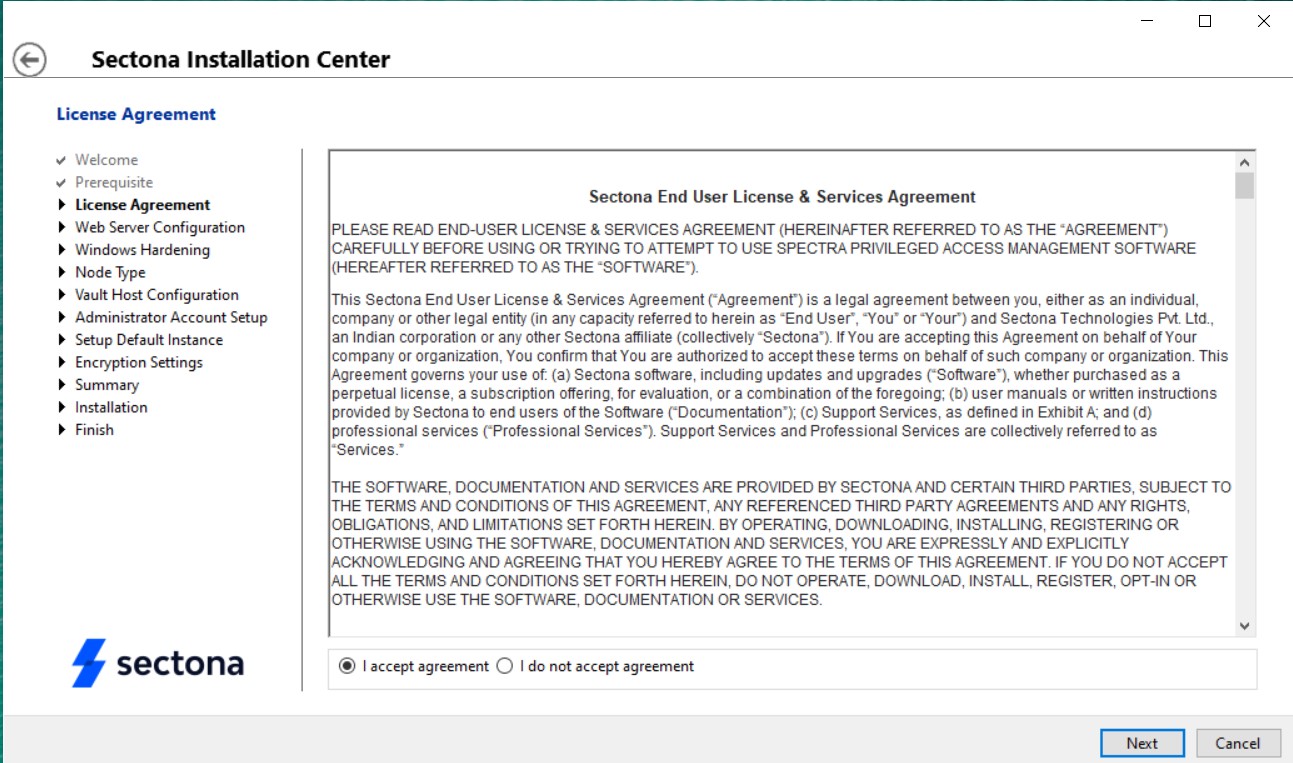
- Review the License Agreement. Select the ‘I accept’ agreement option to accept and continue. Click on Next to continue.
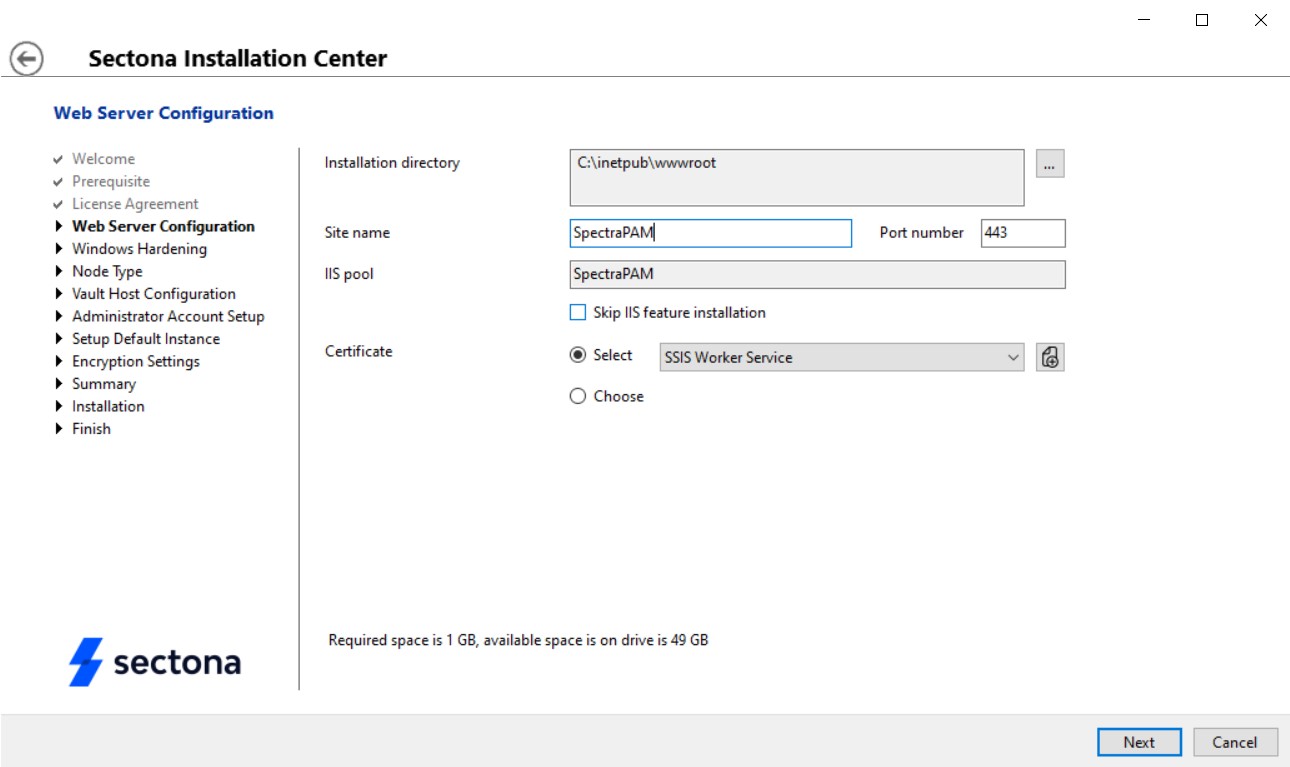
- In case want to add an additional certificate, click on Add self-signed certificate button and you will see the following screen. On the Web Server Configuration page, select the path to install the Sectona web access component (we recommend installing it on a non-OS drive. Provide the name of the site to be recognized by IIS Server and port number (default:443). It is mandatory to install the application with Secure Sockets Layer (SSL) certificate. You will need a certificate that you either request from a trusted root authority or create a self-signed one on your web server. Either select a certificate from the available drop-down list or create a new certificate by selecting 'Create New' or you can choose a file from your local machine using the Choose button. You can update or install a new certificate later on by Configuring HTTPs certificate. Click on Next to continue.
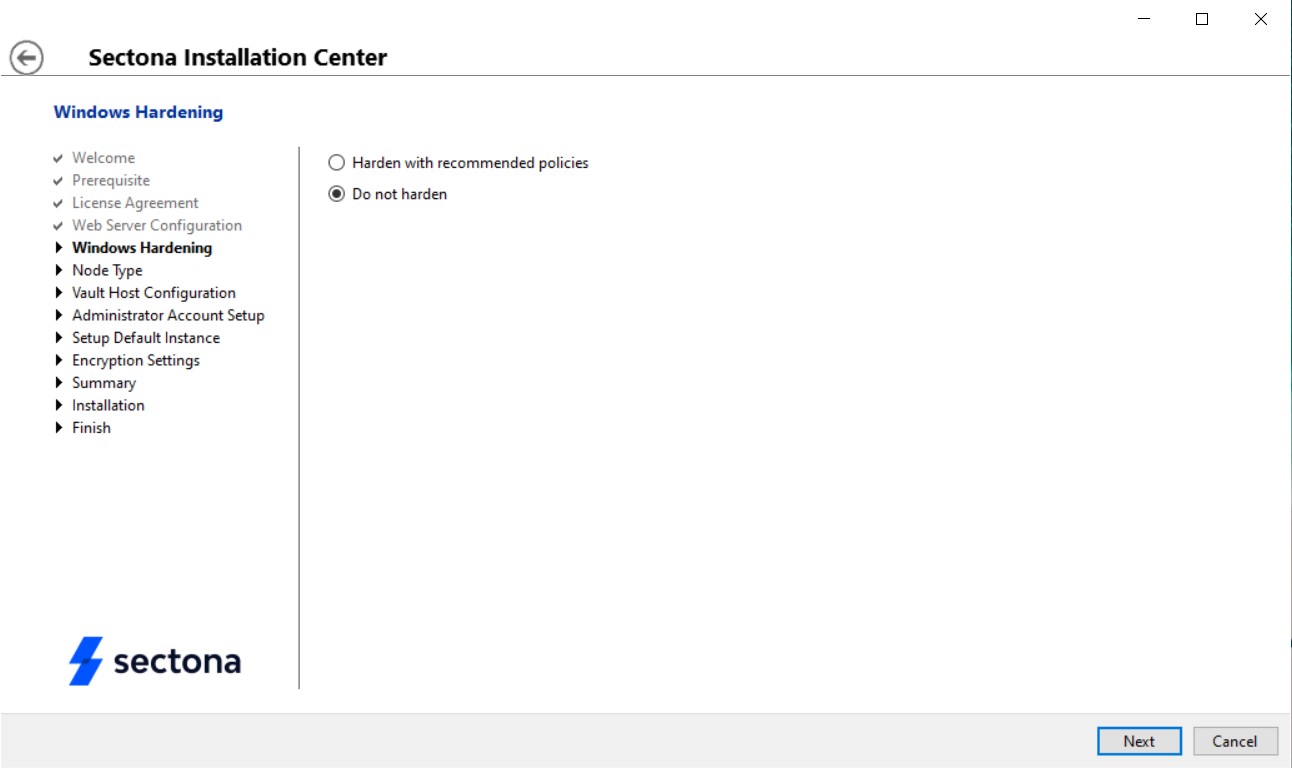
- The system provides an automated method of hardening your application server based on minimum security guidelines. You can install the application without these steps. Consult your support team for hardening based on your settings. Click on Next to continue.
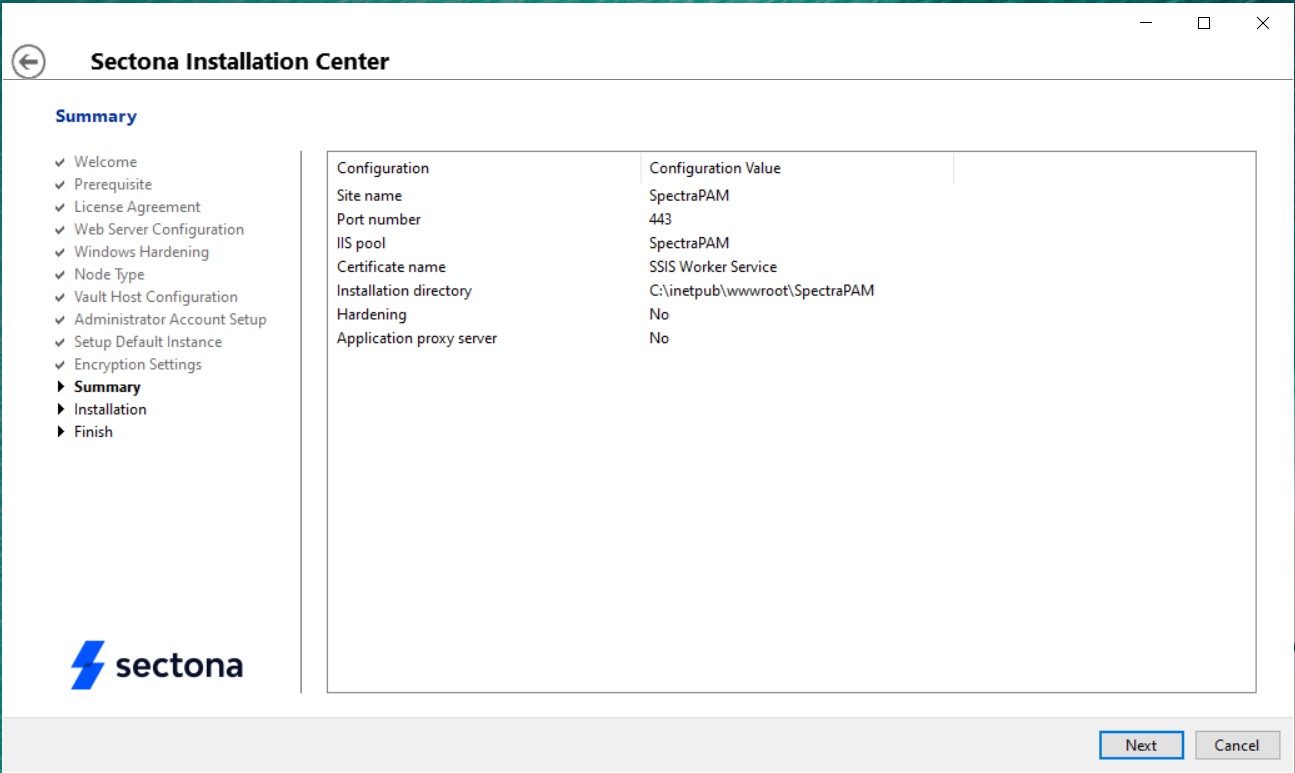
- Validate the application setup.
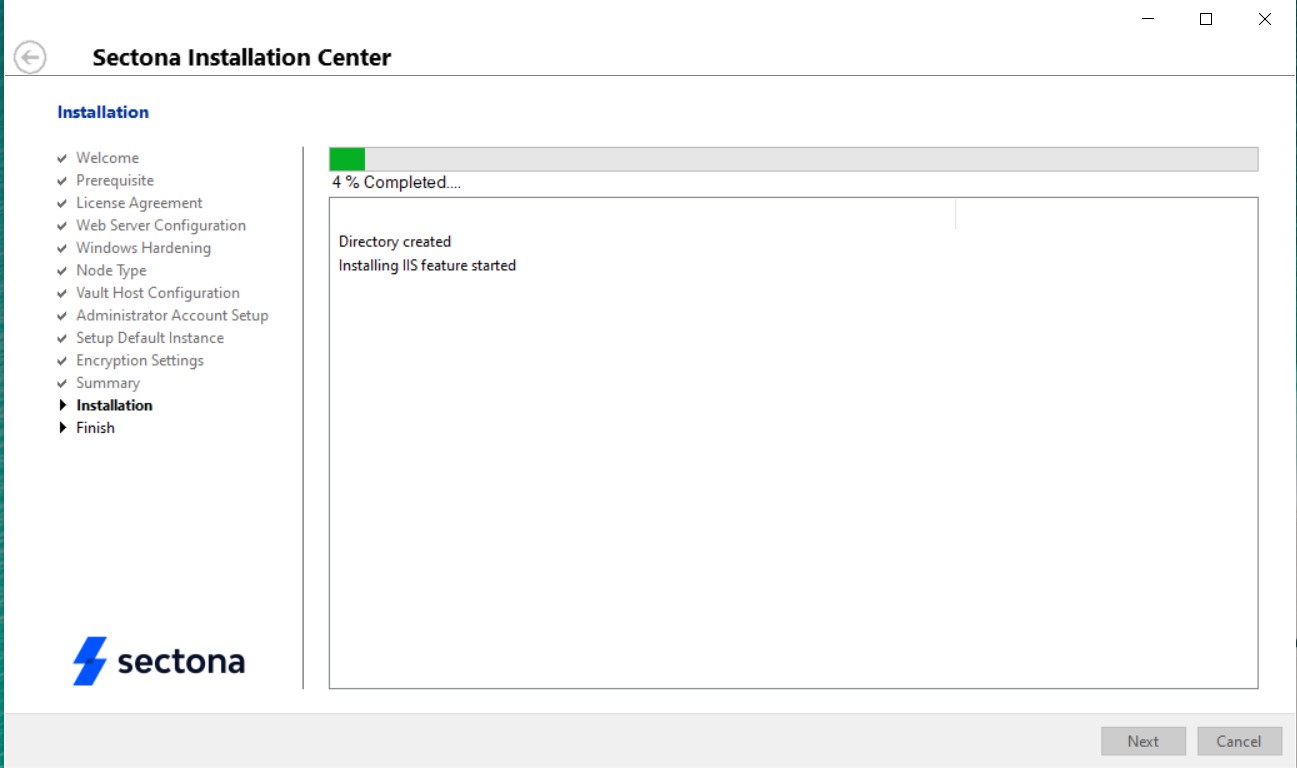
- The installation process will begin.
After a successful installation, the finished page appears. It contains a link for the next step of authentication. Click on the link to continue.

Installing Sectona Web Access with Microsoft SQL Server Vault
Provided you have successfully installed Vault storage component. If not, refer the section EPM Installing Vault Component
Download Sectona Web Access installer from the Download portal. You can also request a copy of the installation from the Sectona Support team. Contact the support team for issues at support@sectona.com.
- Run and initiate the installer.
- Validate prerequisites and install any missing components to rerun the installer.
- Once your pre-requisites are validated, click Next to continue.
- Review the License Agreement. Select the I accept agreement option to accept and continue. Click on Next to continue.
- On the Web Server Configuration page, select the path to install the Sectona web access component (we recommend installing it on a non-OS drive. Provide the name of the site to be recognized by IIS Server and port number (default:443). It is mandatory to install the application with Secure Sockets Layer (SSL) certificate. You will need a certificate that you either request from a trusted root authority or create a self-signed one on your web server. Either select a certificate from the available drop-down list or create a new certificate by selecting 'Create New' or you can choose a file from your local machine using the Choose button. You can update or install a new certificate later on by Configuring HTTPs certificate. Click on Next to continue.
- In case want to add an additional certificate, this option is applicable only if you do not have verified SSL available, you may use this option to generate a Self-Signed certificate. Click on Add self-signed certificate button and when you select the Choose option, a screen will appear from where you can choose your certificates. After choosing your certificate, click on the Next button.

- The system provides automated method of hardening your application server based on minimum security guidelines. You can install the application without these steps. Consult your support team for hardening based on your settings. Click on Next to continue.
- Validate the application setup.
- The installation process will begin.
After a successful installation, the Finish page appears. It contains a link for the next step of authentication. Click on the link to continue.
Browse the website link provided by the installer. Upon accessing the link, you will arrive at the Welcome page for the installation of the Sectona Privileged Access Suite.
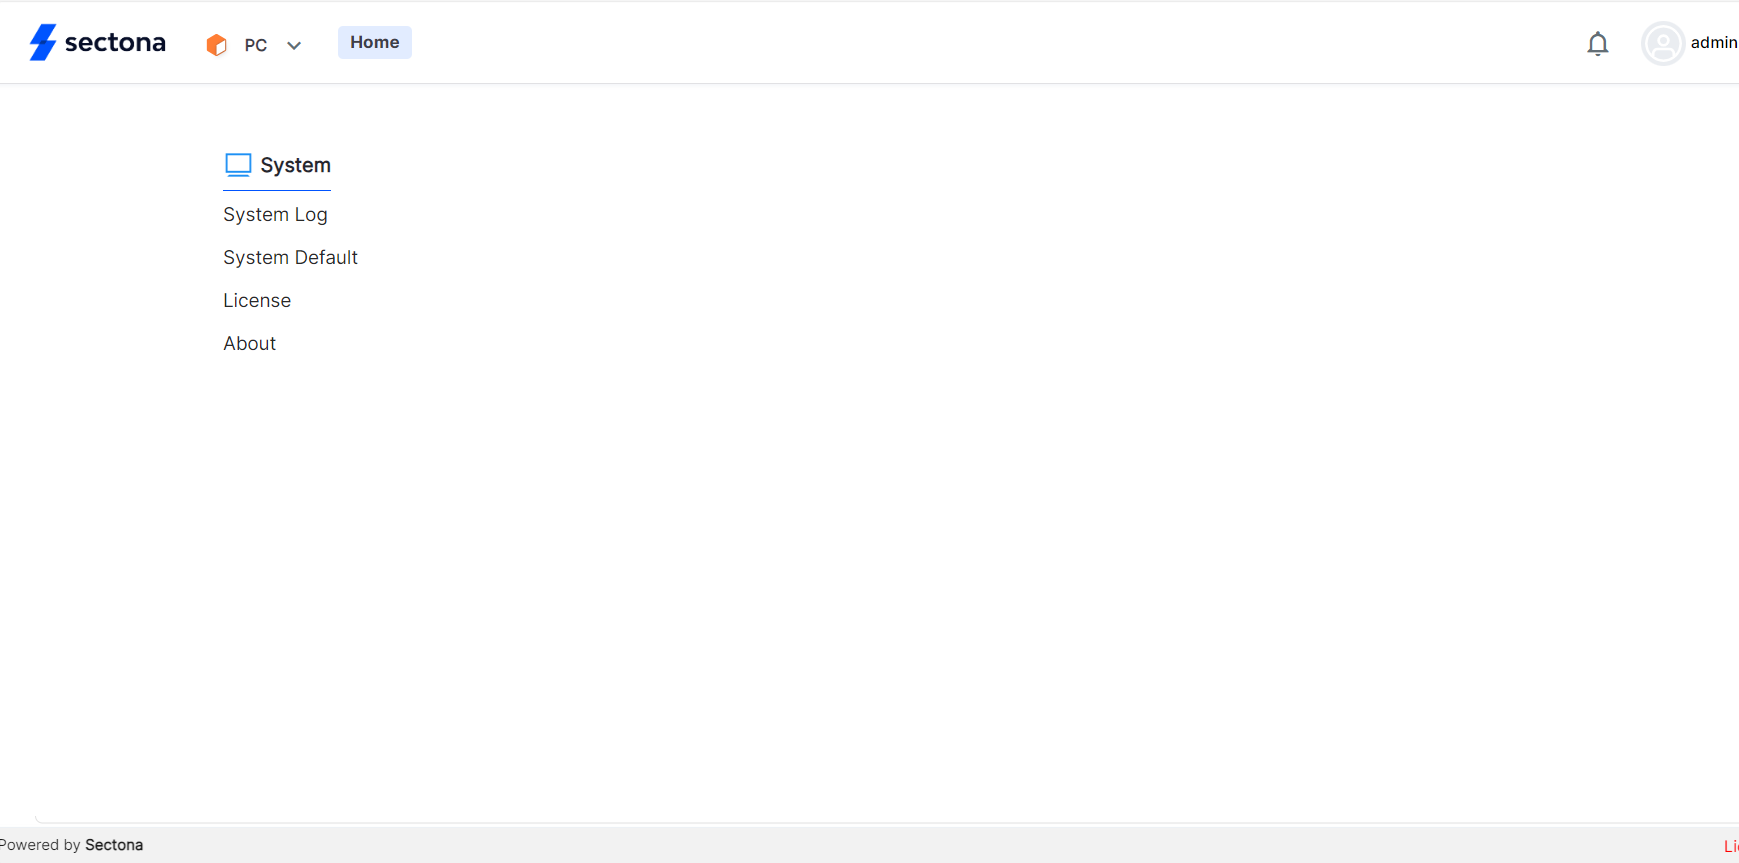
Adding Licenses
Once you have completed the installation and you click on the link. You will be able to view the page as seen below. Click on License to be able to add the license key.
Click on +Add License button.
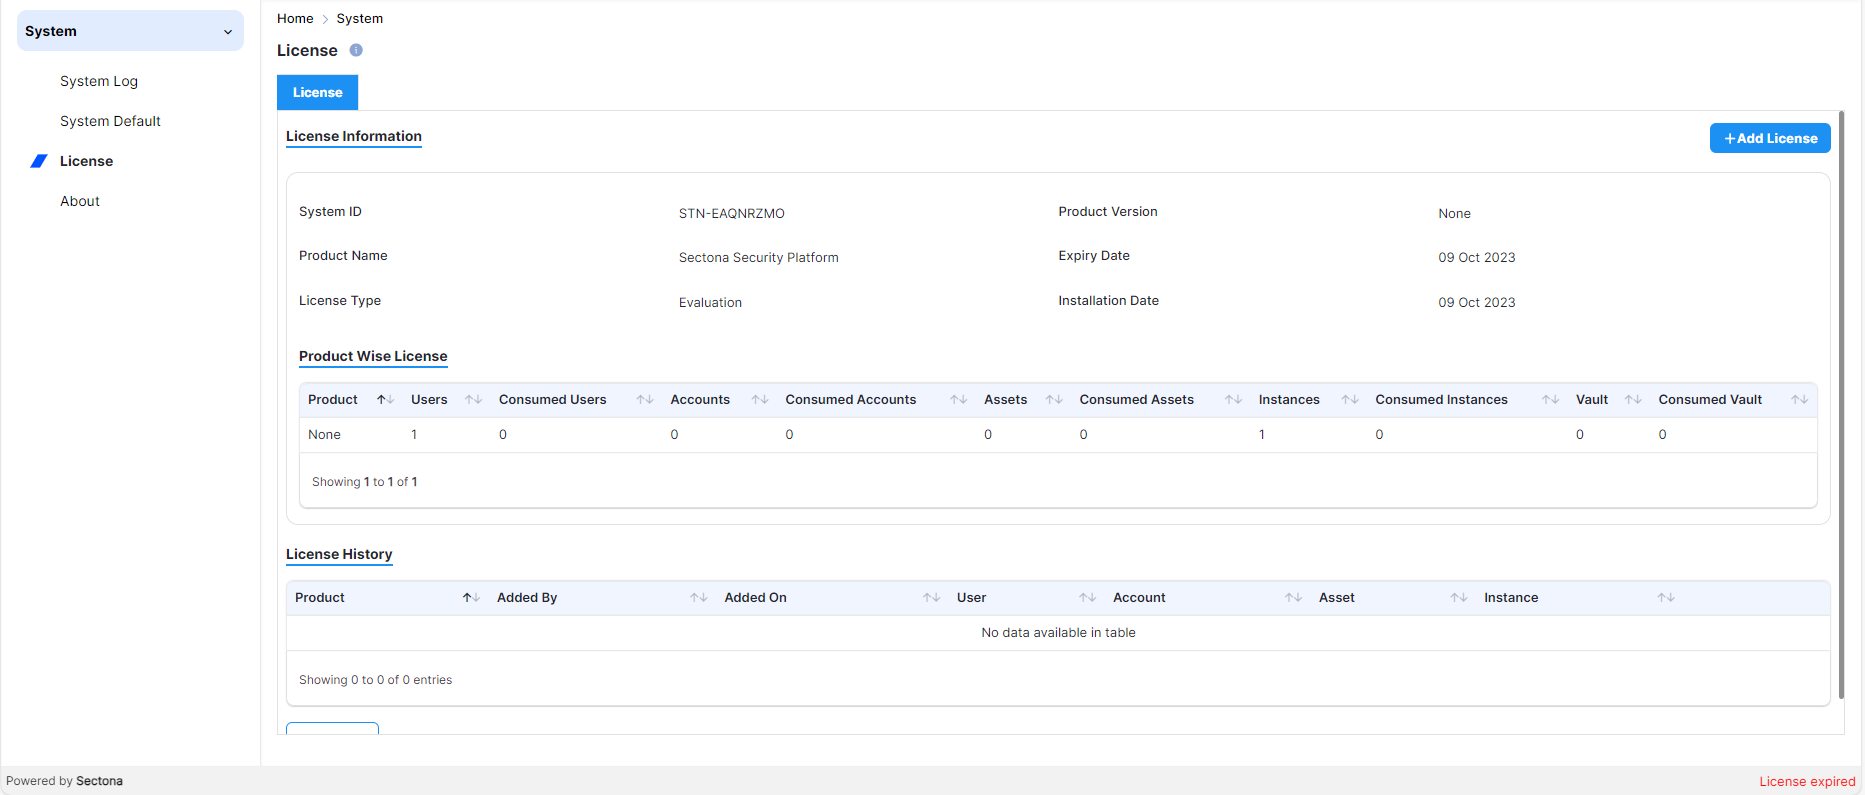
- A form will appear, here you will have to paste the License Key. You will have to contact the support team at support@sectona.com for further instructions.
- Once you have all the details filled, you can generate the VCode which you can paste into this form.
- Click on Submit.

Logout and login back into the system with your username and password.

You will now be able to view the system pages after successful installation.
Installing Web Access for HA
Install Sectona Vault Component using embedded vault or external vault (MS SQL Server) option on the node you need to configure as HA in Sectona. For the installation procedure, refer here.
If using external vault option kindly refer section 'High Availability options for vault instance of Microsoft SQL Server' on page Configuring vault for high availability for HA configuration.
Once the Vault component is successfully installed on the HA node, run the Sectona web access installer again on the node you are trying to configure as HA instance in Sectona. When installing Sectona web access use the 'Application Only' option from the installer and complete the installation.
Now from the Primary Node copy AppConfig.xml file from Folder SectonaPAM > ApplicationData and paste it in SectonaPAM > ApplicationData on HA node.
In case, vault component is installed on a Shared (Cluster) Storage, there is no change in AppConfig.xml file. But if, vault component is installed on the physical drive of the HA node then open the AppConfig.xml file and replace the IP address '<ServerIP Value="X.X.X.X" />' to Vault Node IP address.
For configuring High Availability setting in Sectona please refer here.
Installing Web Access for DR
Install Sectona Vault Component using embedded vault or external vault (MS SQL Server) option on the node you need to configure as DR in Sectona. For the installation procedure, refer here.
If using external vault option kindly refer section 'High Availability options for vault instance of Microsoft SQL Server' on page Configuring vault for high availability for HA configuration.
Once the Vault component is successfully installed on the DR node, run the Sectona web access installer again on the node you are trying to configure as DR instance in Sectona. When installing Sectona web access use the 'Application Only' option from the installer and complete the installation.
Now from the Primary Node copy AppConfig.xml file from Folder SectonaPAM > ApplicationData and paste it in SectonaPAM > ApplicationData on DR node.
In case, vault component is installed on a Shared (Cluster) Storage, there is no change in AppConfig.xml file. But if, vault component is installed on the physical drive of the DR node then open the AppConfig.xml file and replace the IP address '<ServerIP Value="X.X.X.X" />' to DR Vault Node IP address.
For configuring DR setting in Sectona please refer here.