
WSSL (Web Secure Session Launcher) Proxy is a Sectona PAM component that enables secure HTTPS access to PAM.
Before you Begin
-
The two major components that make PAM, Sectona Web Access and Vault Storage Host are installed and setup.
-
Finalise the deployment architecture for privilege access over the internet. Consider the following deployment scenarios and select the more suitable configuration to meet your requirements.
Deployment Scenarios
Case 1) PAM Server is not exposed to the Internet
According to the Sectona architecture and as mentioned in the prerequisites that the Sectona WSSL Proxy and the RAP components are created on the DMZ network. In order to have a secure connection to PAM, an external dedicated server on the DMZ network is required. The aforementioned components are configured on this server. Depending on whether the server configuration is setup where the Sectona Component, Remote Access Publisher is downloaded on a separate server. The connection through this network from an isolated server is routed to through the Public IP using a Public URL in order to access PAM.
Case 2) PAM Server is exposed to the Internet
The architecture is structured where the PAM application, Vault and the WSSL components are situated on a dedicated server in an internal network. This server is exposed to the internet via a public IP. The public IP routed the traffic to the internal network allowing session connection via the WSSL Proxy. There is no requirement of an additional server on a DMZ network for PAM.
System Requirements
|
Components |
Min Users |
Max Users |
Resource Requirement |
RAM |
Processor |
Disk Space |
|
WSSL Proxy |
0 |
50 |
Windows Server 2019 + |
3 |
4 |
C Drive 50GB + D Drive 50GB |
|
WSSL Proxy |
50 |
100 |
Windows Server 2019 + |
5 |
8 |
C Drive 50GB + D Drive 50GB |
|
WSSL Proxy |
100 |
200 |
Windows Server 2019 + |
10 |
16 |
C Drive 50GB + D Drive 50GB |
|
WSSL Proxy |
200 |
400 |
Windows Server 2019 + |
20 |
32 |
C Drive 50GB + D Drive 50GB |
|
WSSL Proxy |
400 |
600 |
Windows Server 2019 + |
30 |
48 |
C Drive 50GB + D Drive 50GB |
|
WSSL Proxy |
600 |
800 |
Windows Server 2019 + |
40 |
64 |
C Drive 50GB + D Drive 50GB |
|
WSSL Proxy |
800 |
1000 |
Windows Server 2019 + |
50 |
80 |
C Drive 50GB + D Drive 50GB |
|
Components |
Min Users |
Max Users |
Resource Requiremen- |
RAM |
Processor |
Disk Space |
|
RAP |
0 |
50 |
Windows Server 2019 + |
4 |
4 |
C Drive 50GB + D Drive 50GB |
|
RAP |
50 |
100 |
Windows Server 2019 + |
4 |
8 |
C Drive 50GB + D Drive 50GB |
|
RAP |
100 |
200 |
Windows Server 2019 + |
8 |
16 |
C Drive 50GB + D Drive 50GB |
|
RAP |
200 |
400 |
Windows Server 2019 + |
16 |
32 |
C Drive 50GB + D Drive 50GB |
|
RAP |
400 |
600 |
Windows Server 2019 + |
24 |
48 |
C Drive 50GB + D Drive 50GB |
|
RAP |
600 |
800 |
Windows Server 2019 + |
32 |
64 |
C Drive 50GB + D Drive 50GB |
|
RAP |
800 |
1000 |
Windows Server 2019 + |
40 |
80 |
C Drive 50GB + D Drive 50GB |
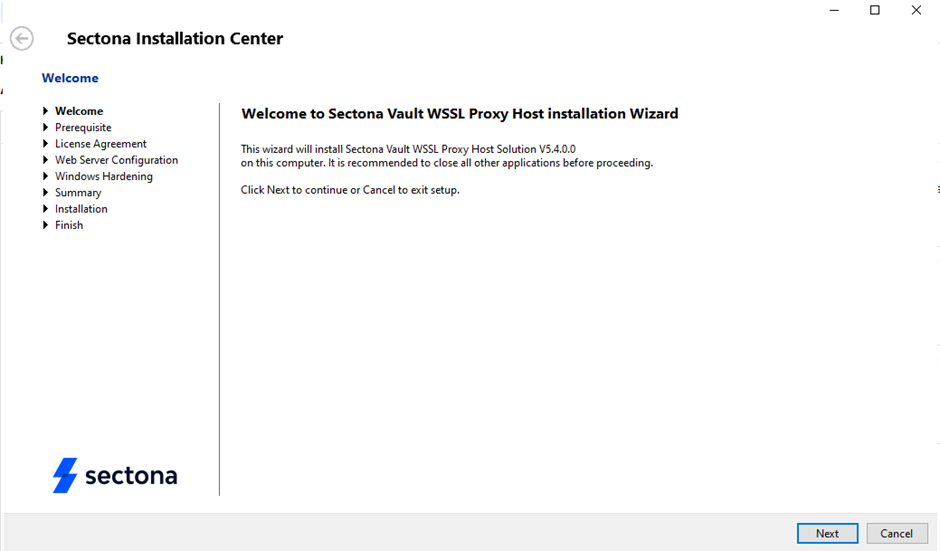
Install the WSSL Proxy Component
-
Login to the Sectona portal.
-
On the Platform Configuration page, under the System section, click on About.
-
Click on the components tab.
-
Download the WSSL Proxy Host component by clicking on the download icon.
-
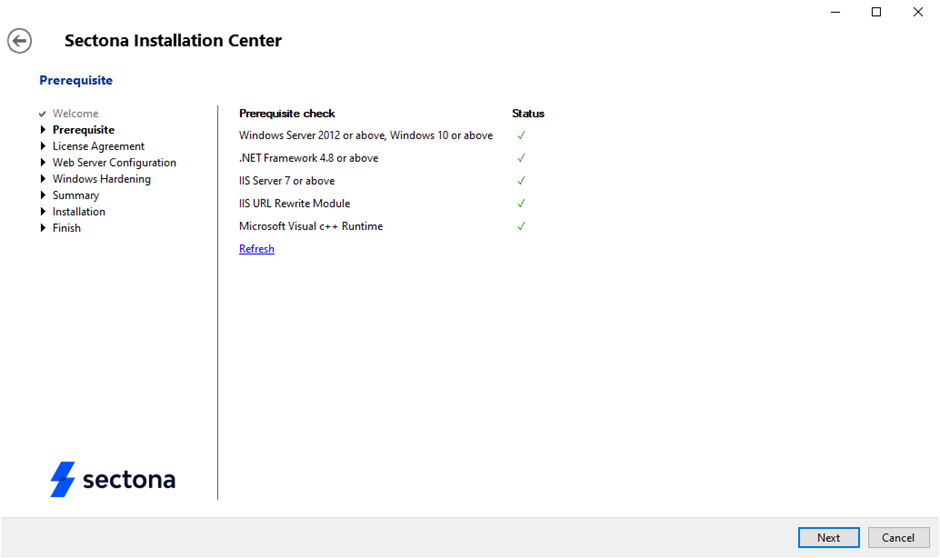
Run the installer and install the missing prerequisite components by clicking on "Install" option.
-
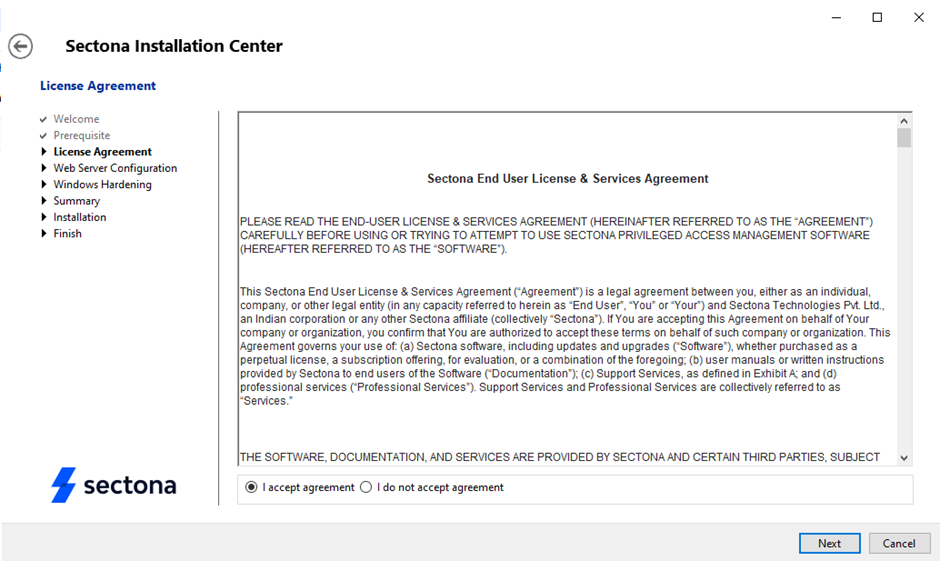
Accept the license agreement
-
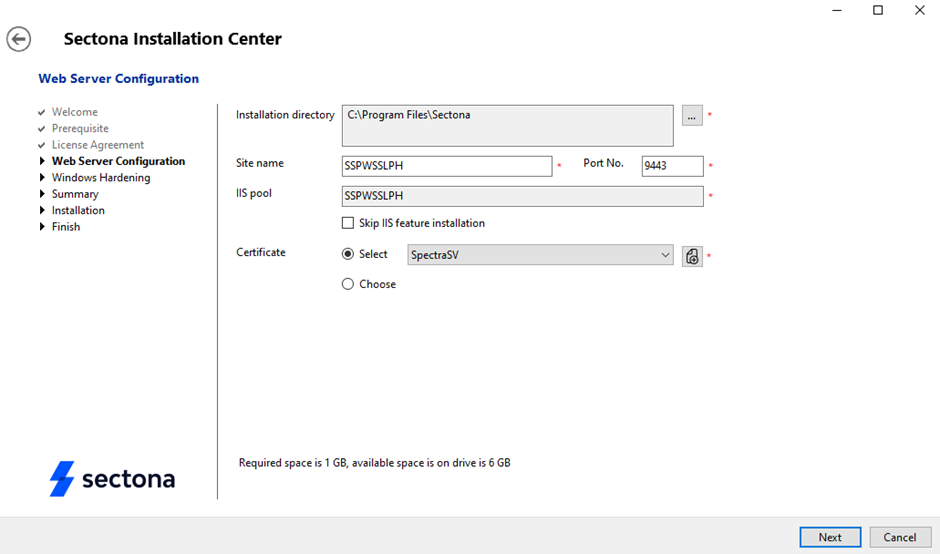
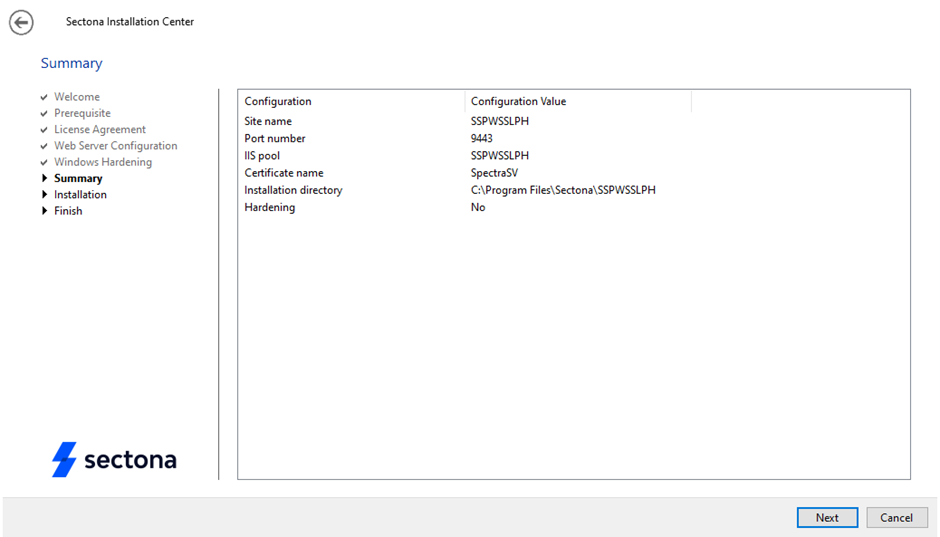
Enter the following details in the form displayed.
|
Installation Directory |
Browse a custom directory or leave the default directory. |
|
Site Name |
Set a custom Site Name |
|
IIS Pool |
The Pool name is replicated from the Site name. |
|
Port No. |
Enter a custom port, default is set to 9443 |
|
Checkbox |
Skip IIS Feature Installation if already present |
|
Certificate |
Select the configured certificate identical to the PAM Server |
-
After entering the correct details click on Next.
-
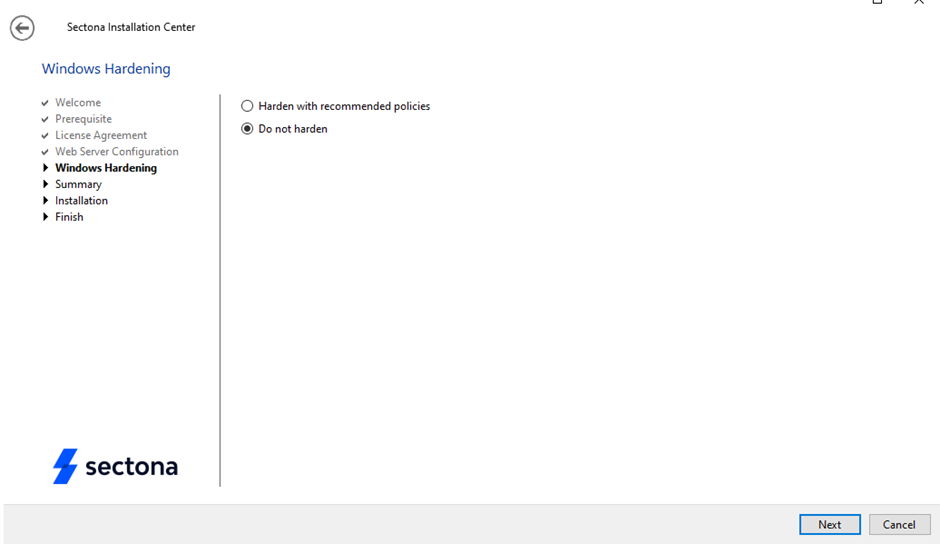
Select the "Do Not Harden" option.
-
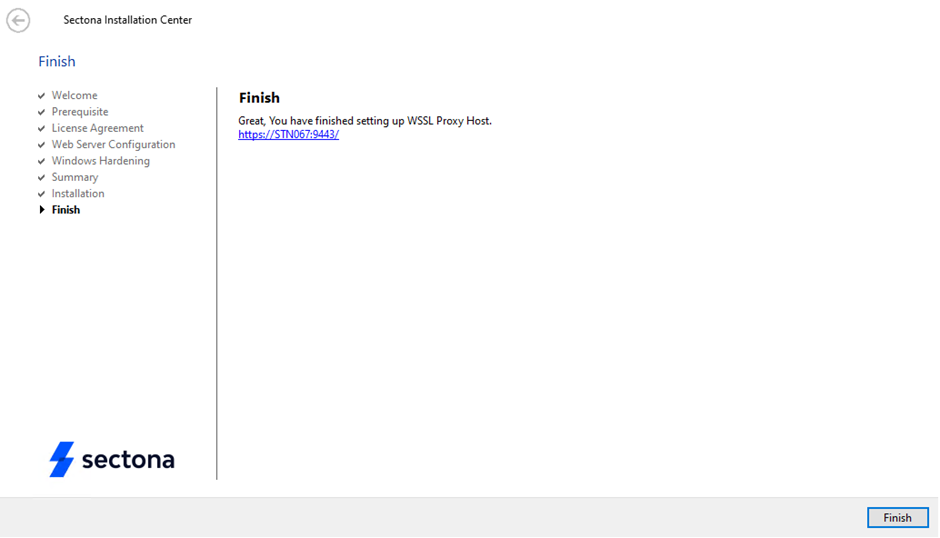
The progress bar of the installation will be displayed. After completing 100% click on Next.

-
Click on the link displayed to connect to Sectona PAM via WSSL Proxy.
Configure WSSL Proxy Component in PAM
-
Login to the Sectona Portal and select PAM from the Product Navigator.
-
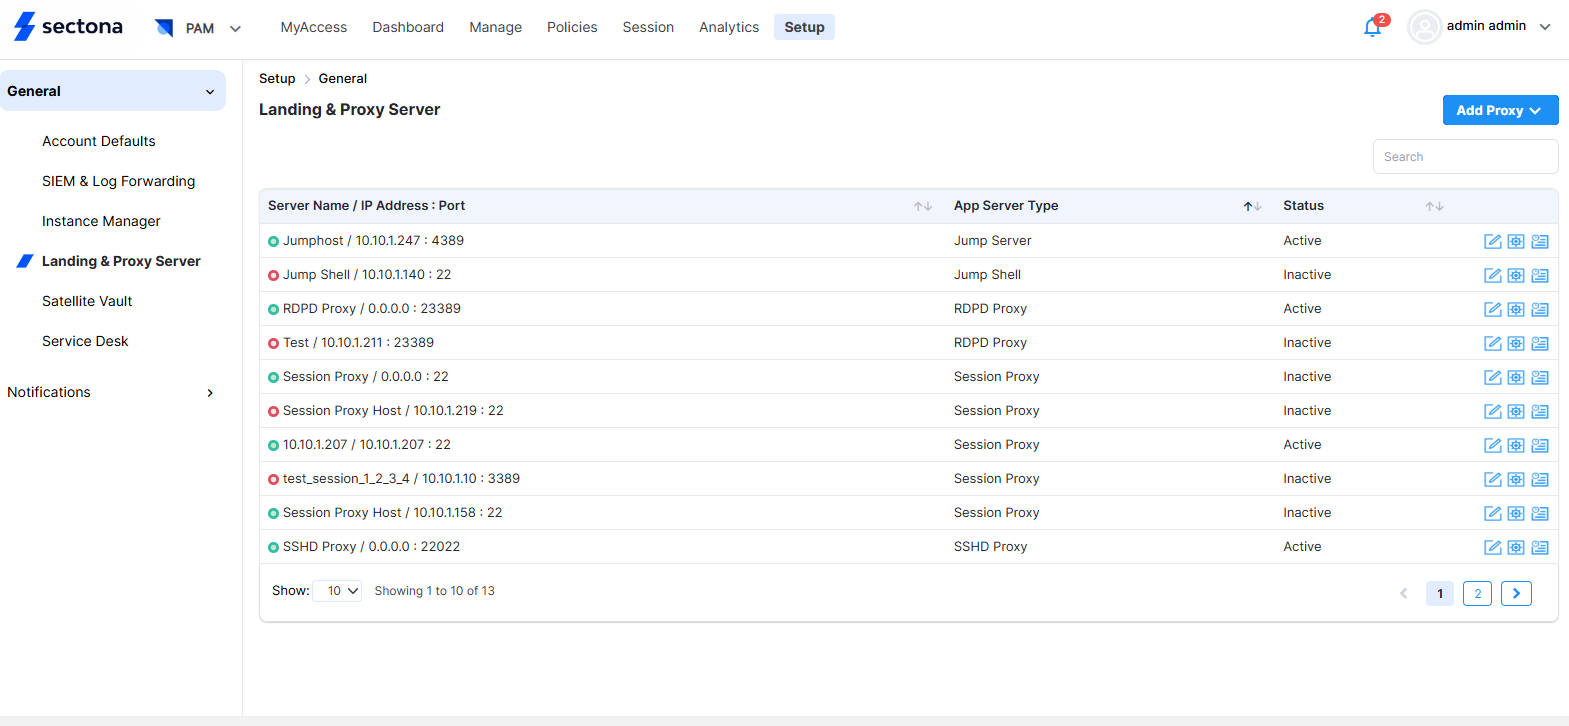
Click on Setup from the Navigation Bar.
-
Select Landing and Proxy Server from the sidebar.
-
Click on Add Proxy → WSSL Proxy from the menu from the top right.
-
Enter the following details in the form displayed.
|
Server Name |
Mandatory |
Enter the name of the Server. |
|
Host Name |
Mandatory |
Enter Host Name |
|
IP Address |
Mandatory |
Enter the physical IPv4 Address of the WSSL Proxy server. |
|
Port No |
Mandatory |
Enter the same port number as set during installation, default is set to 9443 |
|
Filter |
Optional |
Disable the All Assets checkbox in order to implement the Filter. Select IP Segment or Location that needs to be accessed over the WSSL proxy. |
|
All Instances |
Mandatory |
Checkbox to select All Instances |
|
Log Server |
Optional |
Select the Log Server from the menu or select the checkbox for default. |
|
Availability Check |
Mandatory |
Select Active |
|
Status |
Mandatory |
Set to Active by default. |
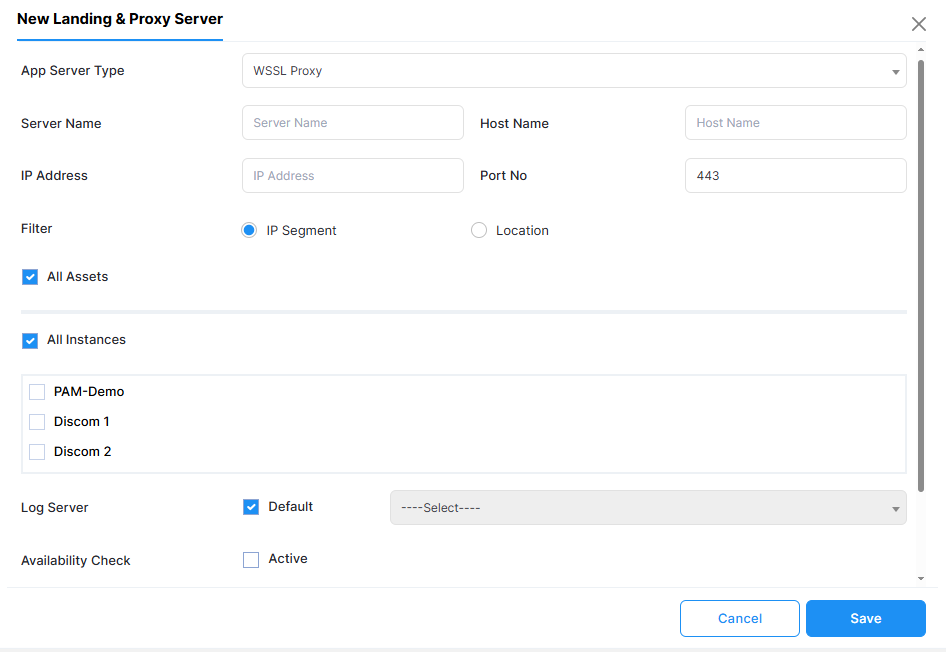
Click on Save.
-
Define and configuring NAT. Click on the Action button of the newly created proxy.
|
IP Range |
Virtual IP |
Virtual Port |
Over LAN |
|---|---|---|---|
|
Default has to be set to 0.0.0.0-255.255.255.255. |
Enter the public URL of the WSSL proxy |
The WSSL proxy port. |
Not Applicable |
Custom ranges can be entered depending on the user’s existing IP Address.
For example, IP range can be specified for users working in a hybrid state in order to control access and maintain efficient utilisation of bandwidth.
How to define IP range depending on location.
-
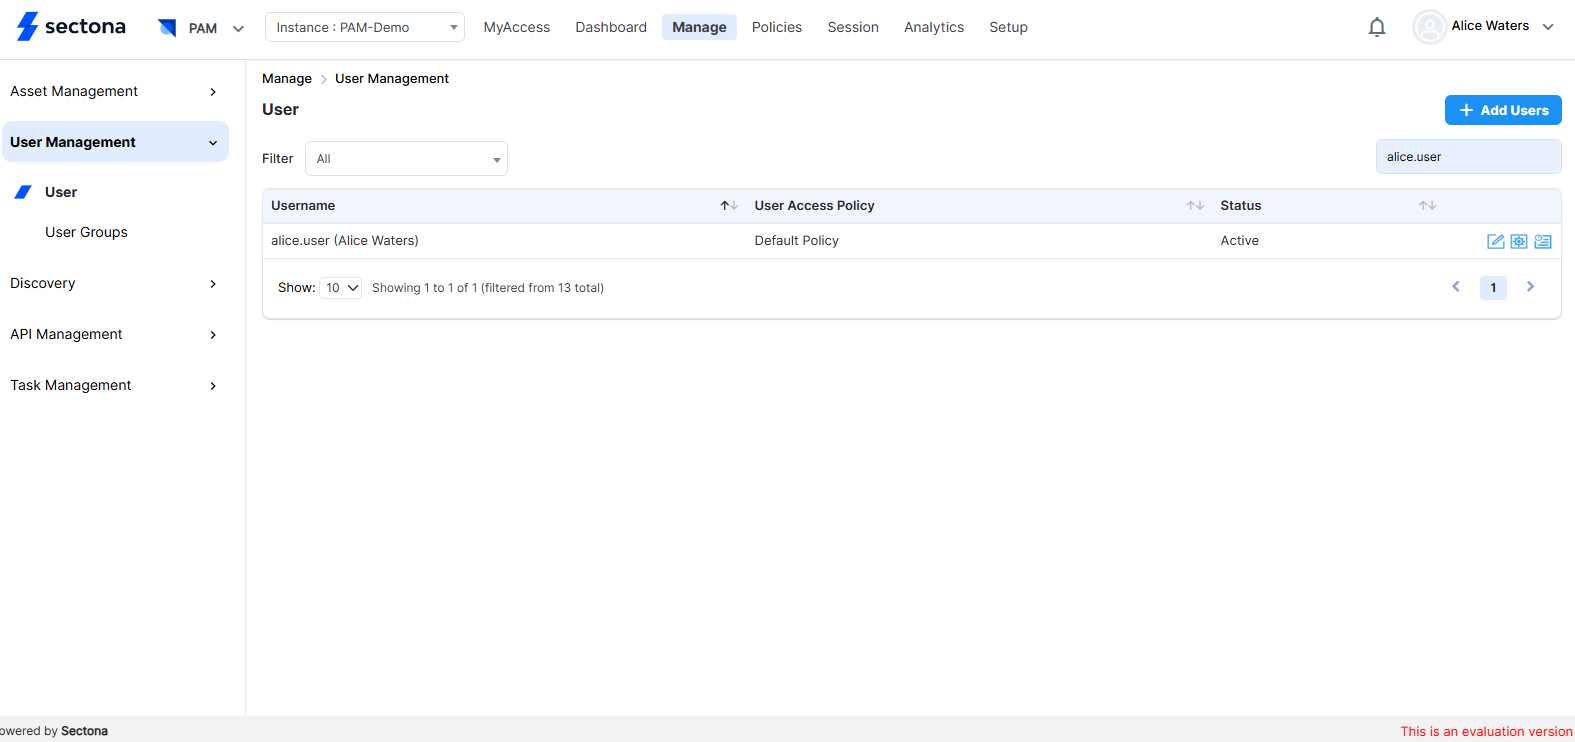
Click on Manage and click on User Management → User section in the sidebar.
-
Check the User Access Policy of the selected User by click on Policies from the Navigation Bar.
-
Enter the name of the User Access Policy in Search and click on its respective Action button.

-
Select the Access Type from the drop-down menu and under the Permission menu select the Enforce WSSL option.
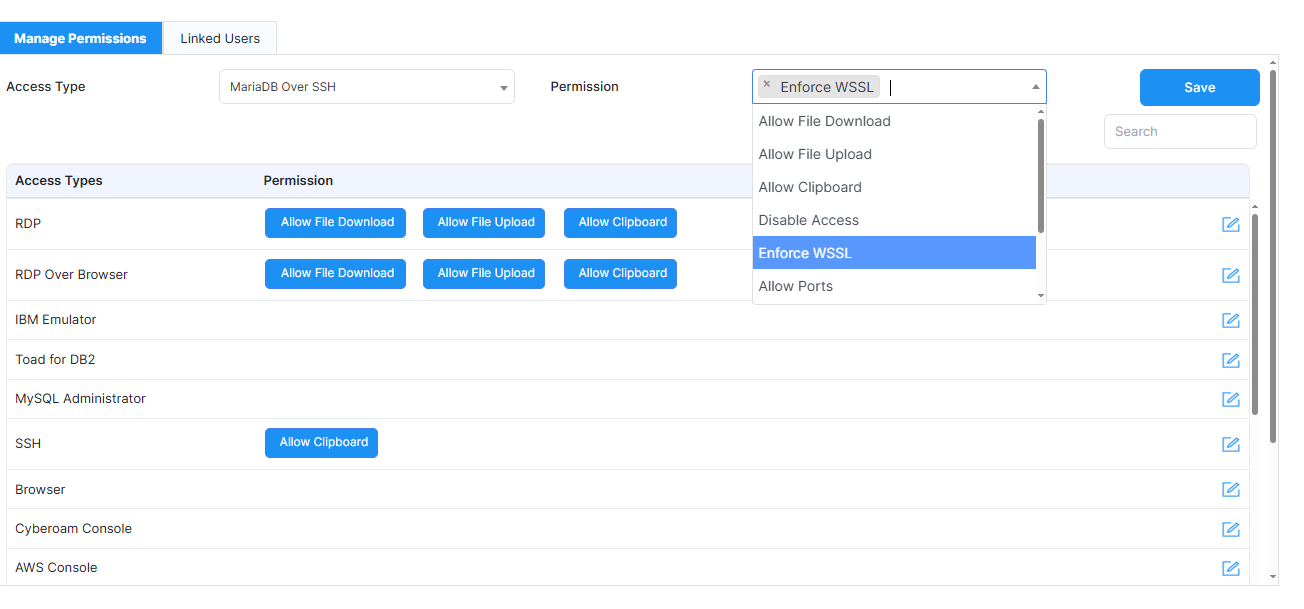
Click on Save