
Issue
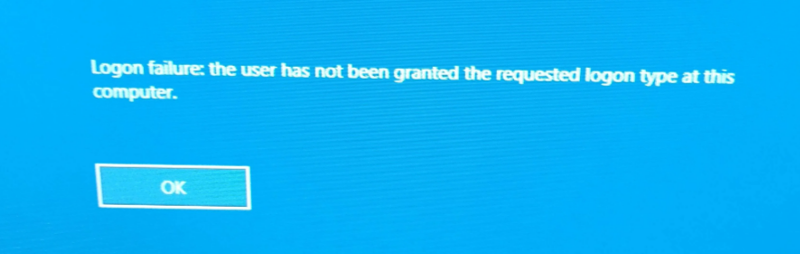
During the Jump Server setup, you may encounter a “Logon Failed error”.
Resolution
Method 1: Grant the “Allow log on locally” Permission
-
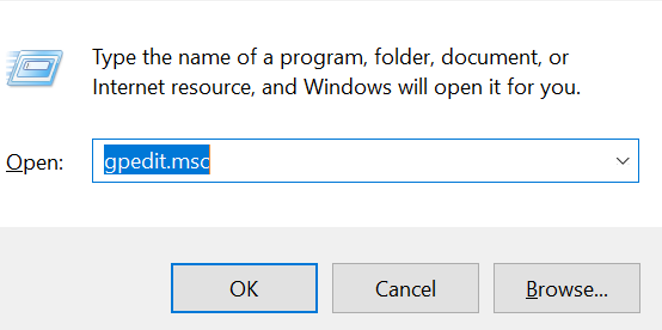
Click Start, type “gpedit.msc” and press Enter.
-
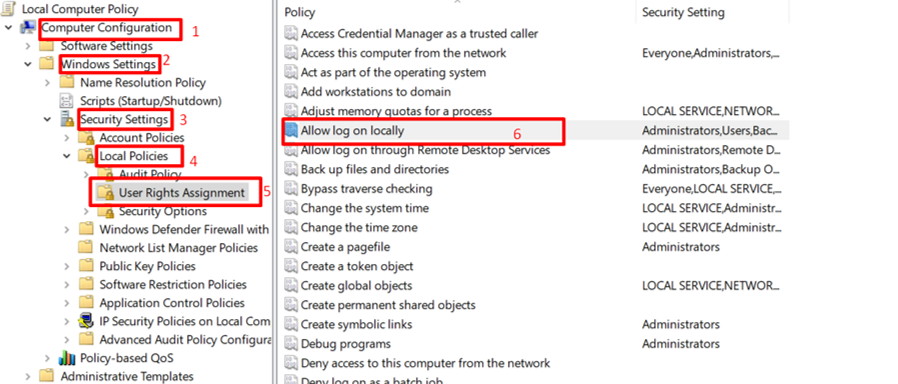
Navigate to Computer Configuration -> Windows Settings -> Security Settings -> Local Policies -> User Rights Assignment.
-
Double-click Allow log on locally.
-
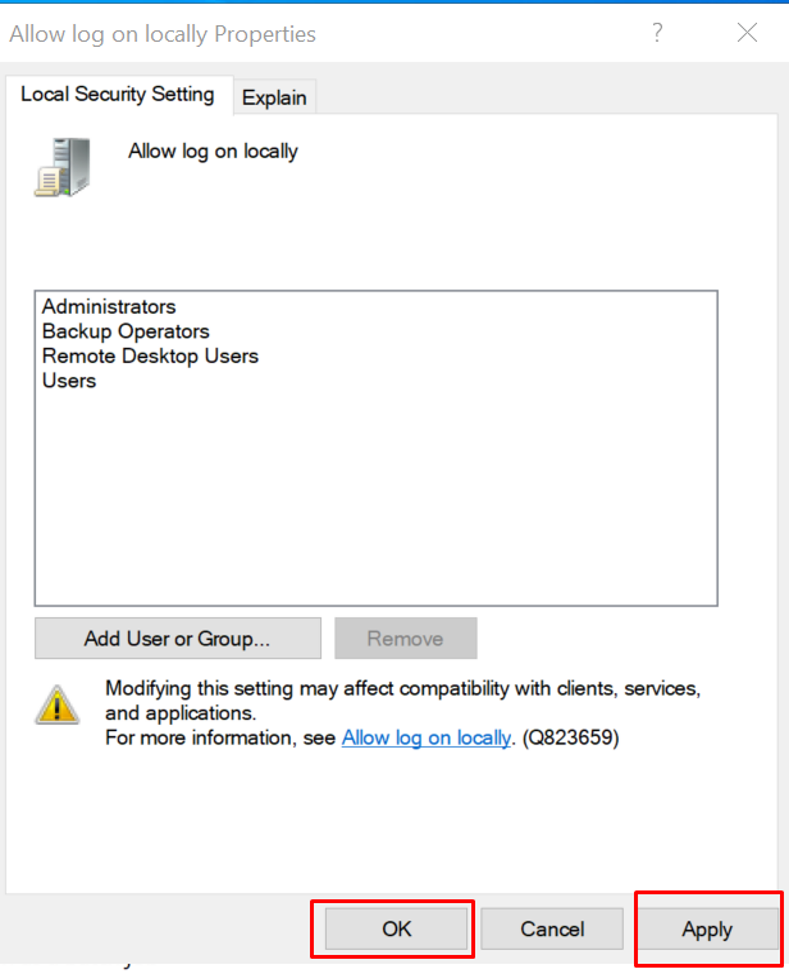
Click Add User or Group, add the Remote Desktop Users group, and click OK to save the changes.
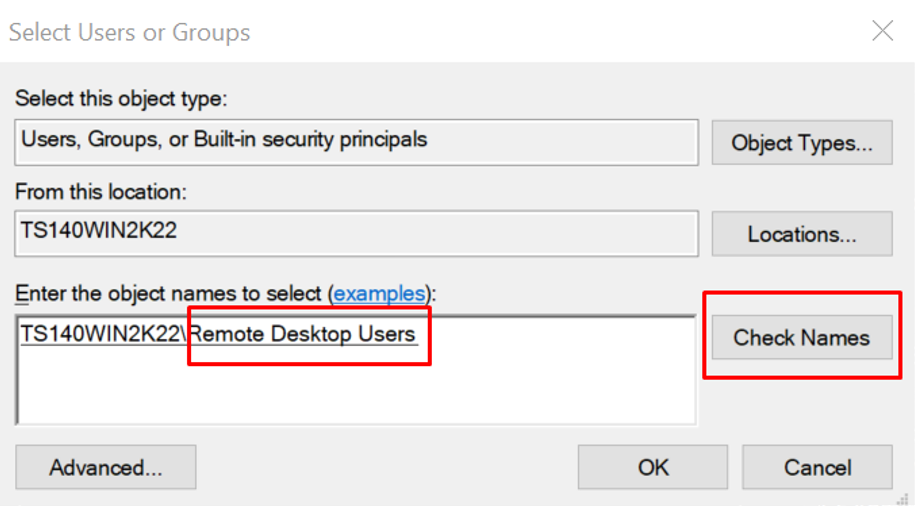
If Remote Desktop Users isn't visible, click Object Types, select Groups, click OK, and search again. Then find and add the Remote Desktop Users group as shown below.
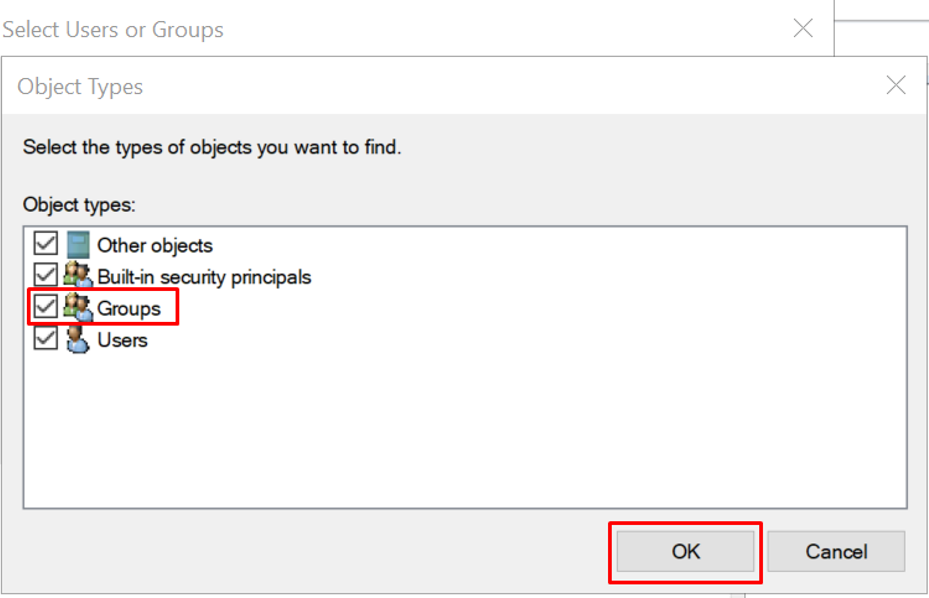
-
After adding the Remote Desktop Users group, click Apply and then OK to save the changes.
Method 2: Disable local policy "Always prompt for password"
-
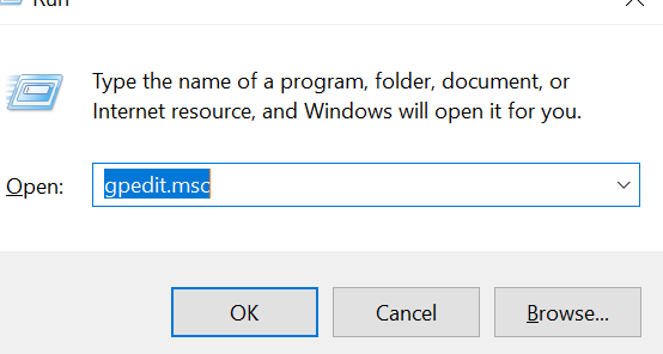
Open Run, type “gpedit.msc” and press Enter.
-
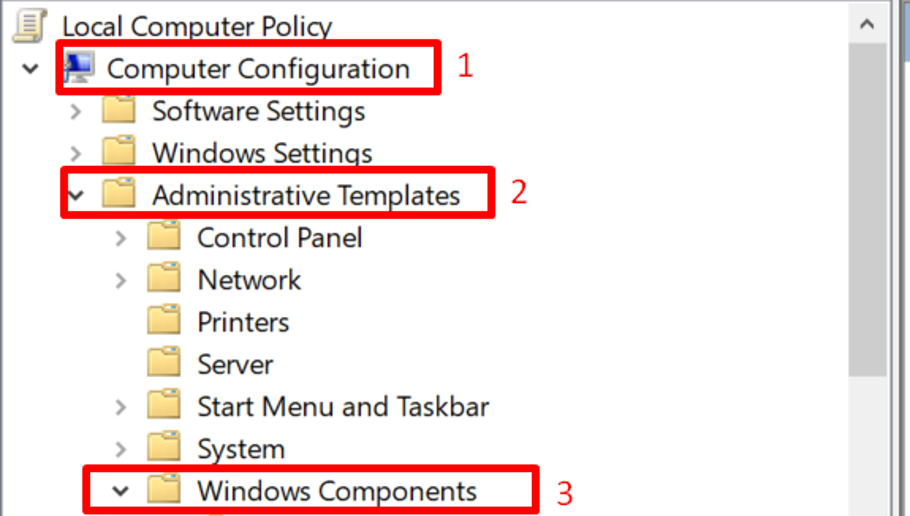
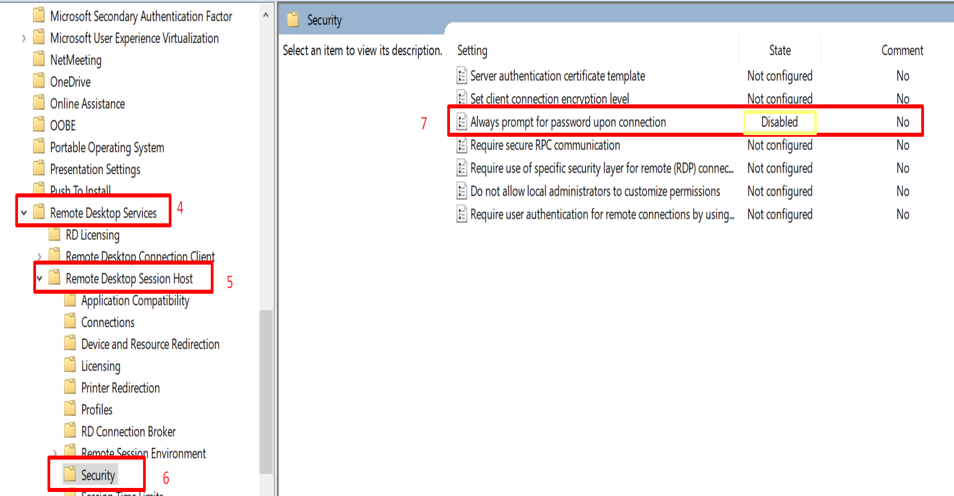
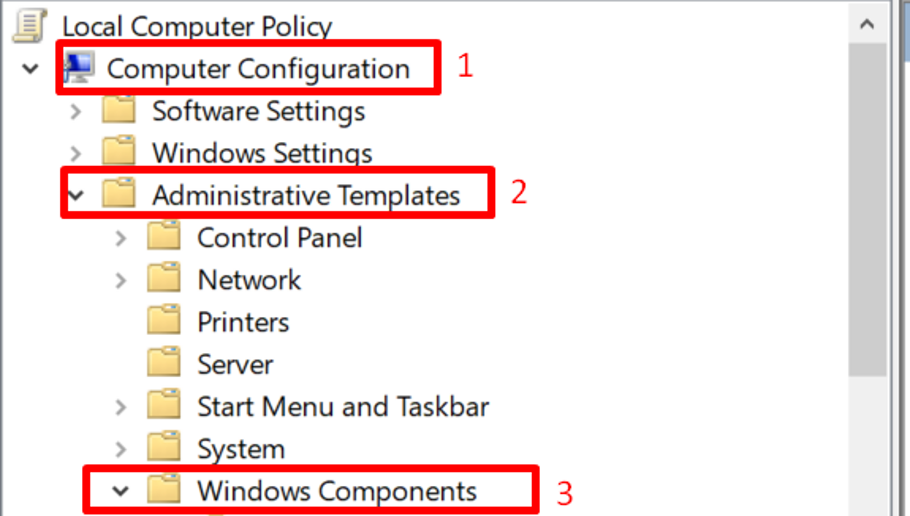
Navigate to Computer Configuration -> Administrative Templates -> Windows Components -> Remote Desktop Services -> Remote Desktop Session Host -> Security.
-
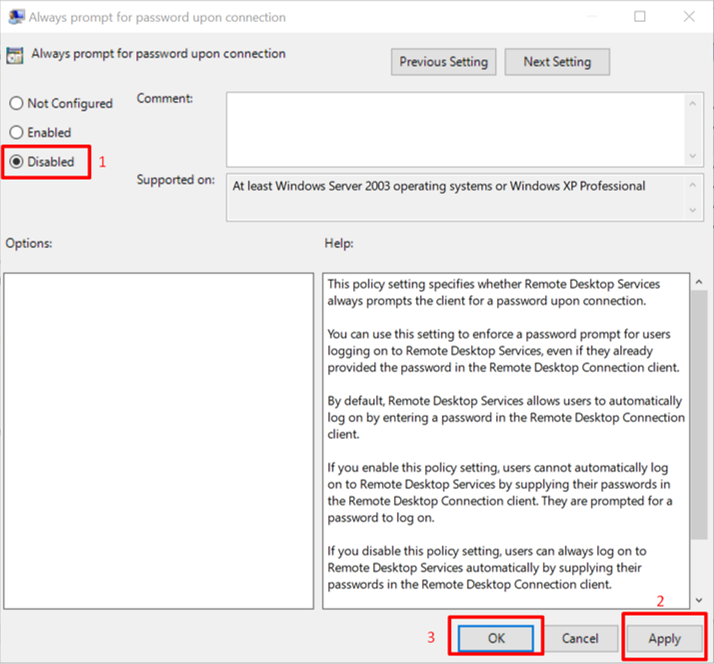
Locate and double-click Always prompt for password upon connection.
-
Select Disabled, click Apply, then OK to save your changes.
Method 3: Disable Network Level Authentication (NLA)
-
Open Run, type “gpedit.msc”, or search for Local Group Policy Editor from the taskbar.
-
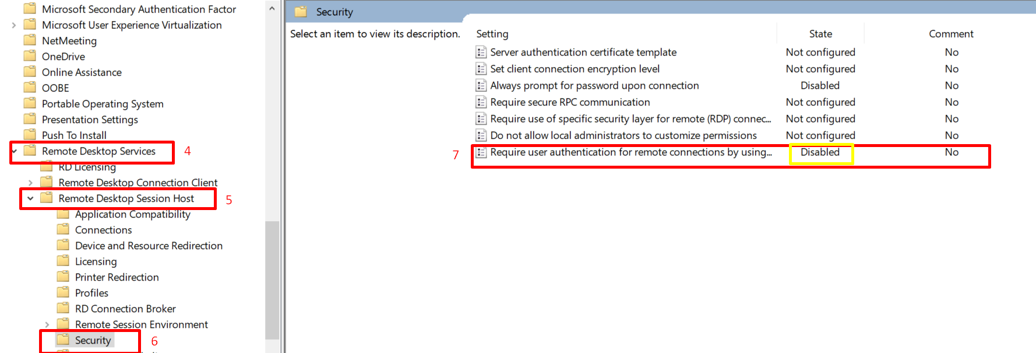
Navigate to Computer Configuration -> Administrative Templates -> Windows Components -> Remote Desktop Services -> Remote Desktop Session Host -> Security.
-
If the setting is enabled, double-click it (or right-click and choose Edit).
-
Select Disabled on the left, then click Apply and OK.
If the policies do not apply properly, restart the server to ensure the settings take effect. Alternatively, you can run the “gpupdate /force” command from the Command Prompt to manually apply the updated policies.